Keycloak
The following example include Web Flow and Mobile Flow examples.
A working flutter example can be found here: https://github.com/azuma-healthtech-public/mimoto-examples/tree/main/flutter-keycloak-ce
Keycloak Setup
The following example is created on the TU/Test environment of azuma mimoto.
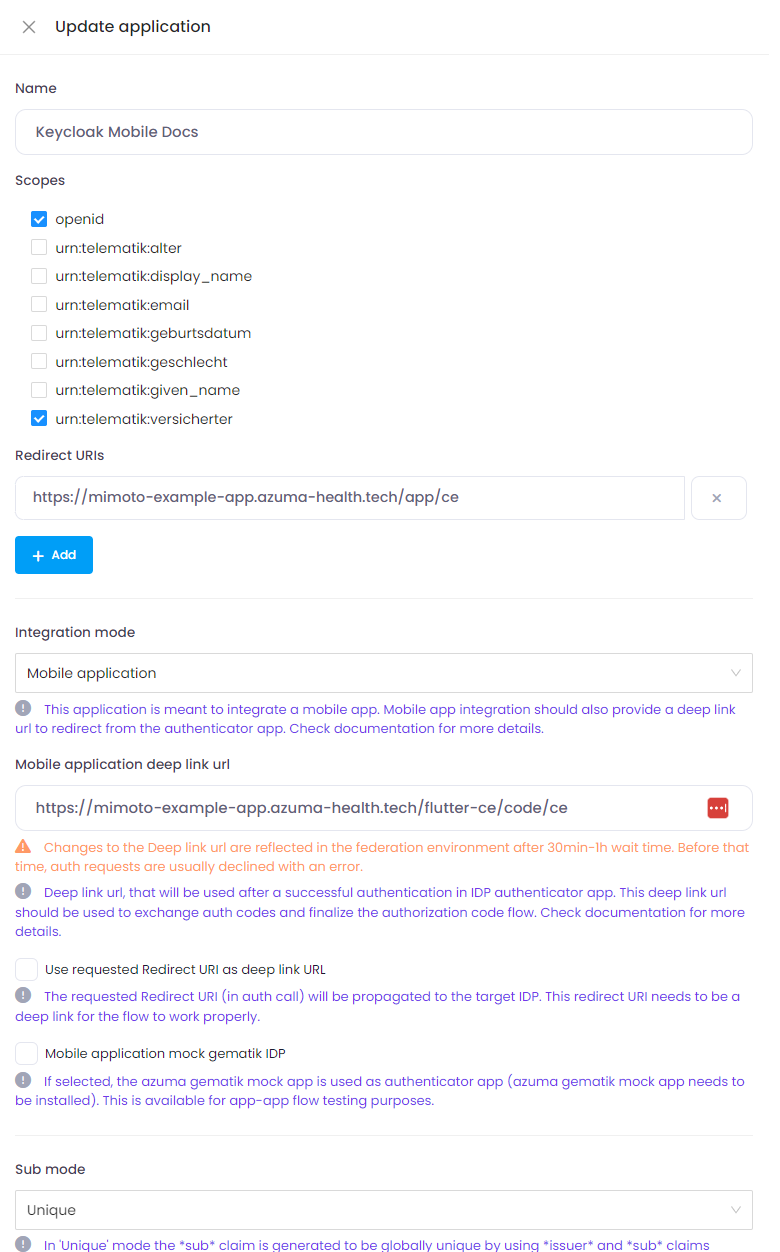
Step 1: azuma mimoto - Create new Application
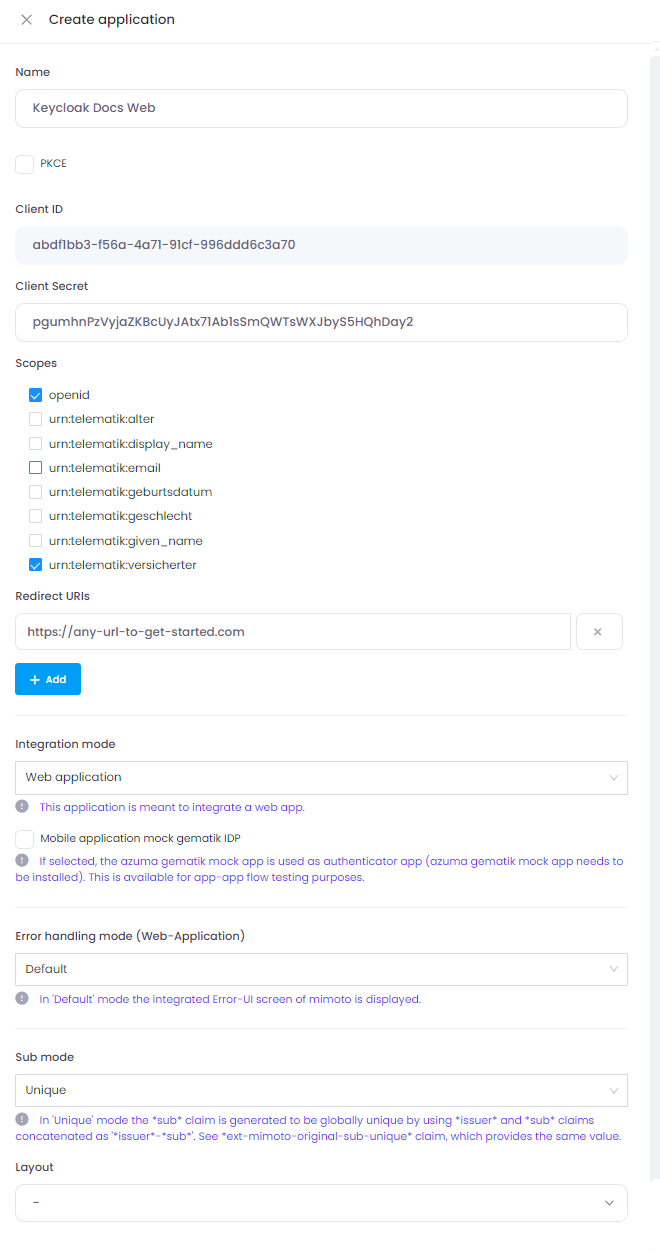
In azuma mimoto Developer Portal: Create a new application (non PKCE, as connection is done between Keycloak and Mimoto on the backend side).
The Redirect URL will be filled out later. Make sure Sub mode is set to Unique to ensure we received a globally unique sub claim.
We only take minimal scopes in this example.
Important: Dont forget to copy Client ID and Client Secret.
Step 2: Keycloak - Register Identity Provider
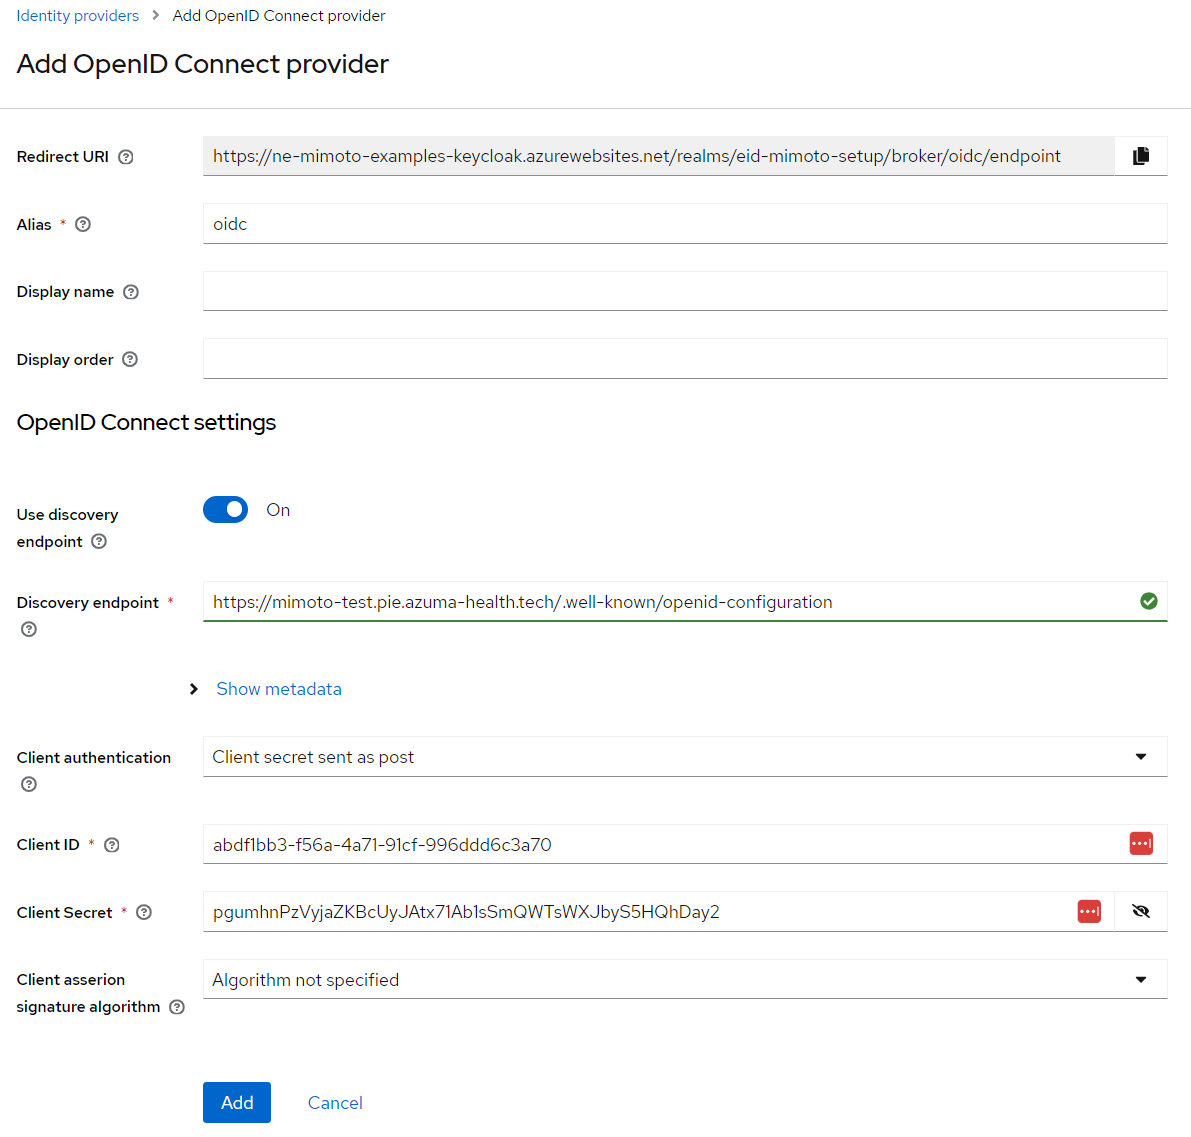
In Keycloak administration: Under Identity Providers, add a new 'OpenID Connect v1.0' provider for azuma mimoto.
Please use the Client ID and Client Secret from step 1 and the mimoto discovery URL, e.g. for TU/TEST: https://mimoto-test.pie.azuma-health.tech/.well-known/openid-configuration
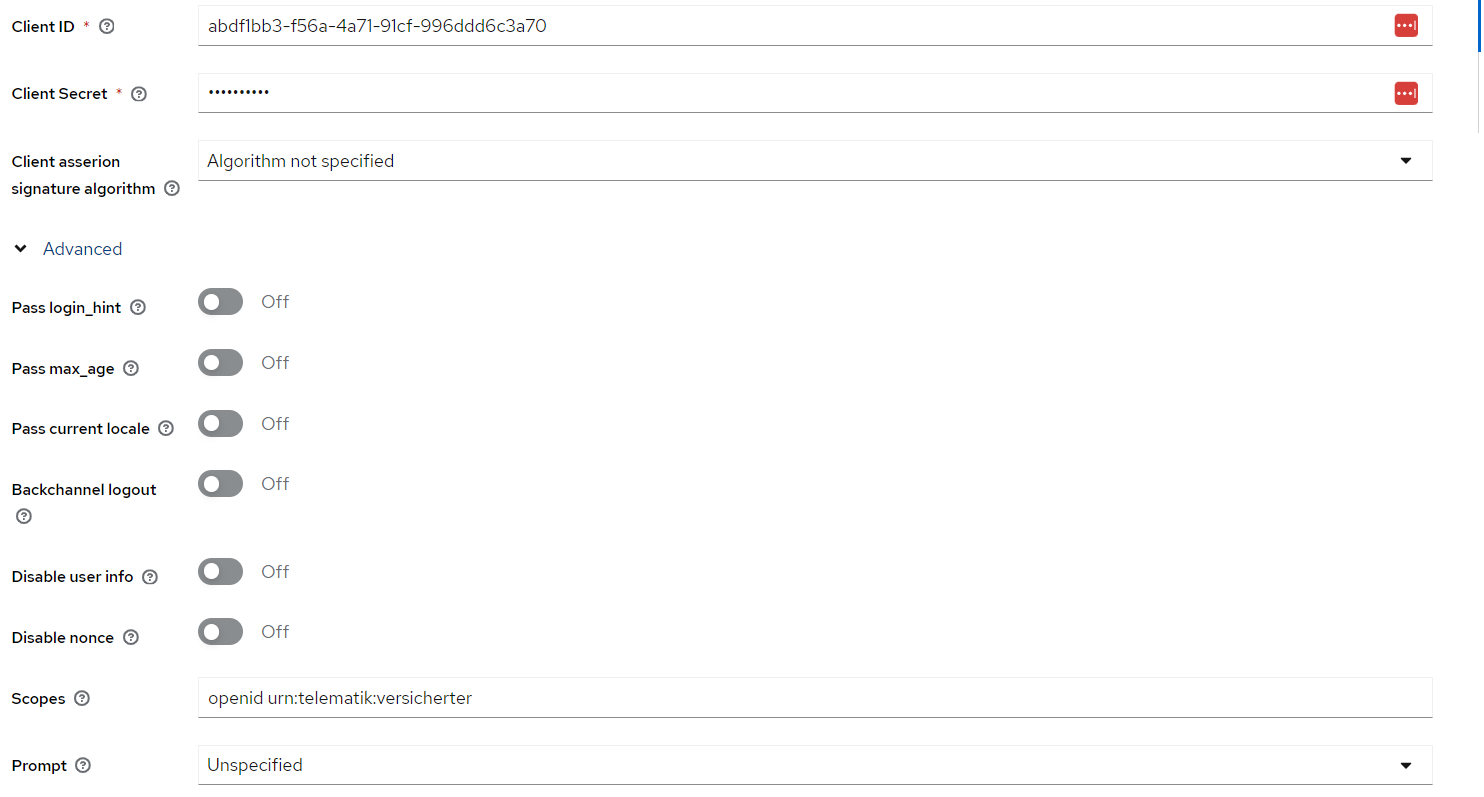
After creation, please adjust the default scopes and advanced properties:
And also enable "Trust Email" as well as adjust the allowed redirect URL in azuma mimoto application (You should add the Keycloak Identity Provider Redirect URL in the azuma mimoto application).
Step 3: Keycloak - Create Client
Create a new client for OpenID connect authorization code flow and setup the configuration as fits your needs (including redirect URLs etc).
You should be using a PKCE-client here.
Step 4: Keycloak - Create Mappers
Mappers are required to map data from Health-ID token to your user model. The following is a very simple example for a mapper, you should consider how the registration process for new users should look like when new accounts are logged in via Health-ID and adjust accordingly.
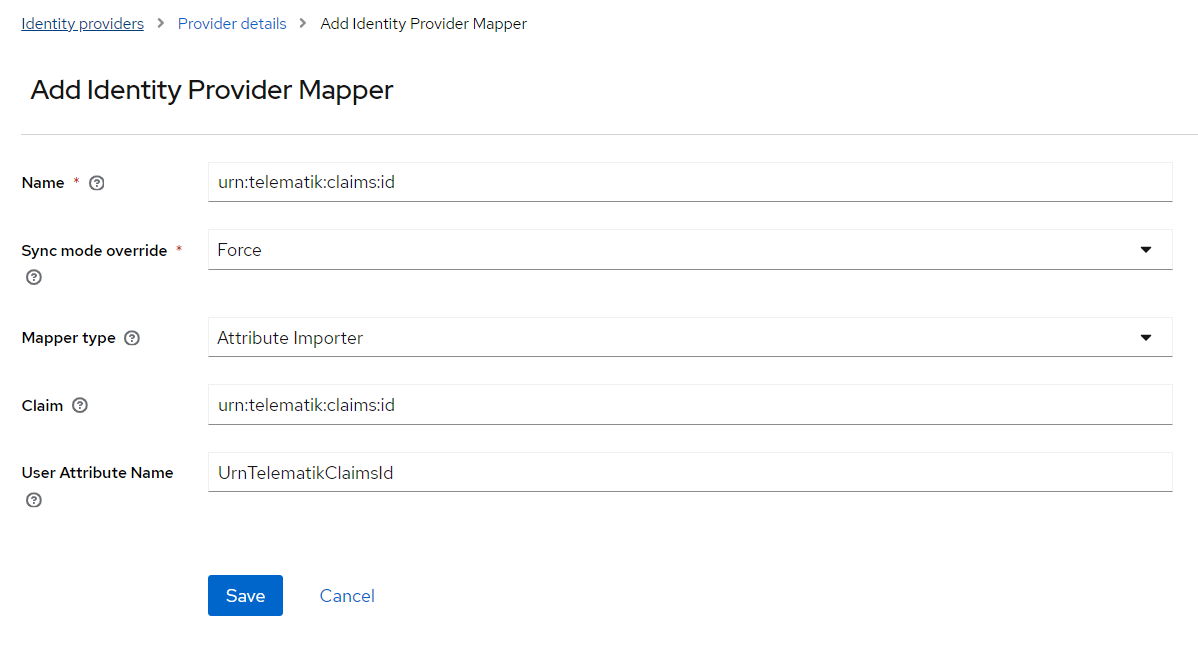
We created mappers for following attributes
- firstName
- lastName
with the Health-ID claim "sub" just for demo purposes.
Step 5: Test integration
Using the new client with the OpenID Connect Authorization Code Flow, we can test the overall process, which looks like this:
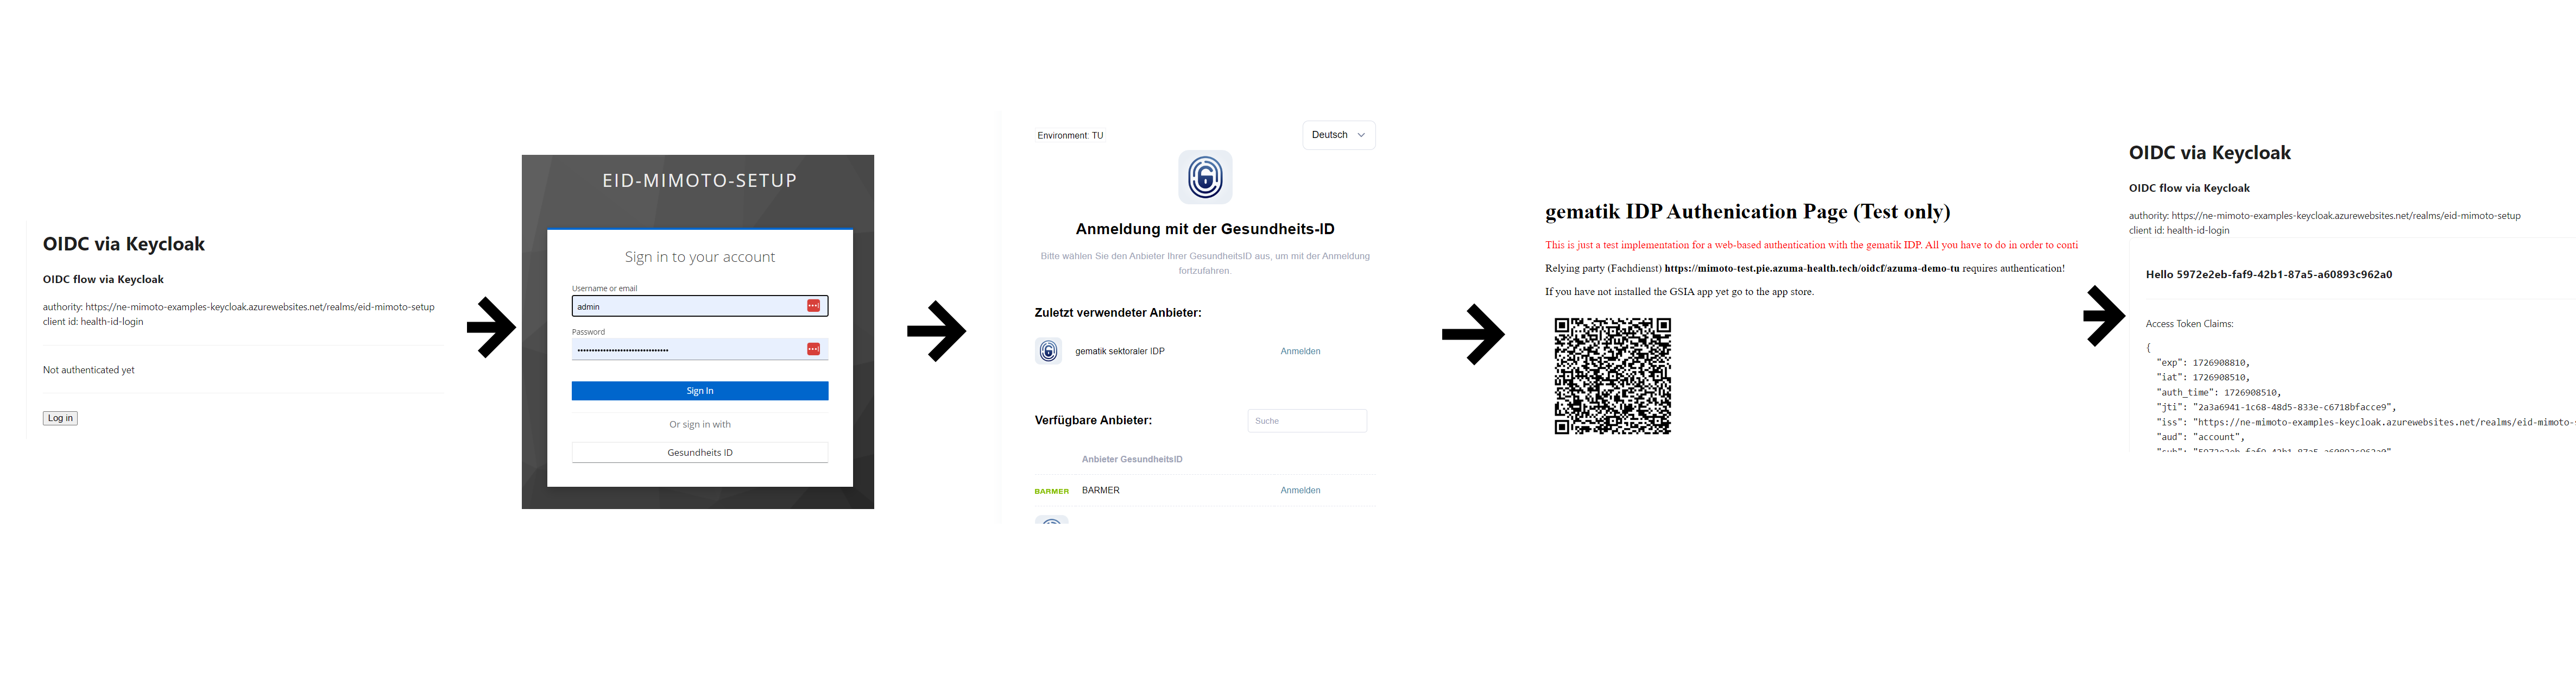
The user is created implicitly via the mappers defined above (if missing).
Keycloak Setup (Mobile-Flow)
The Mobile flow example uses the token-exchange feature of Keycloak, which requires the following features to be enabled
- token-exchange
- admin-fine-grained-authz
In addition to our setup below, please follow the official documentation on how to set up the "external-token" to "internal-token" exchange: https://www.keycloak.org/docs/latest/securing_apps/#external-token-to-internal-token-exchange
As preparation, the Steps 1, 2 and 4 from above need to be executed.
Step M1: azuma mimoto - Create new Application
In azuma mimoto Developer Portal: Create a new application. Make sure Sub mode is set to Unique to ensure we received globally unique sub claim.
We only take minimal scopes in this example.
Step M2: Keycloak - Create Token Exchange Client
(1) Create Client
- Create a new client, e.g. "token-exchange-client"
- Enable Client authentication
- Under "Permissions" click on "On"
(2) Create Policy:
- Go to Clients->real-management->Authorization->Policies
- Create a new client policy for "token-exchange-client"
(3) Assign Policy to Client
- Go to "token-exchange-client"->Permissions->"token-exchange"
- Select previously created policy and save
(4) Assign Policy to Identity Provider
- Go to Identity Provider and Permissions
- Enable permissions
- Go to "token-exchange", select the policy and save
Step M3: Implement the login process
Implement the login process until token exchange as described in Mobile Flows and extend it with token exchange implementation. See our https://github.com/azuma-healthtech-public/mimoto-examples/tree/main/flutter-keycloak-ce example.
Step M4: Test integration
See video in https://github.com/azuma-healthtech-public/mimoto-examples/tree/main/flutter-keycloak-ce. (Demo.mp4)
Hints and considerations
In this example we defined very simple claim mappings to showcase the overall process. In a real world integration, it is important to consider the UX for the end user, especially during the registration process. E.g.: you could consider checking if a user is already present in Keycloak and if not, provide custom screen(s) to add further properties prior or after the implicit registration.